
Background
I was tasked with making a tutorial video for my Web Asset Production class, a class that focuses on creating media to be put online, like branded cinemagraphs, or tutorial videos. The intention of this video from a technical standpoint is to show my ability to use video editing programs like Screenflow, using tools like audio ducking and faded scene transitions. I chose to focus my tutorial on Inkarnate.com, a map-making tool that I have experience in.
Intended Audience
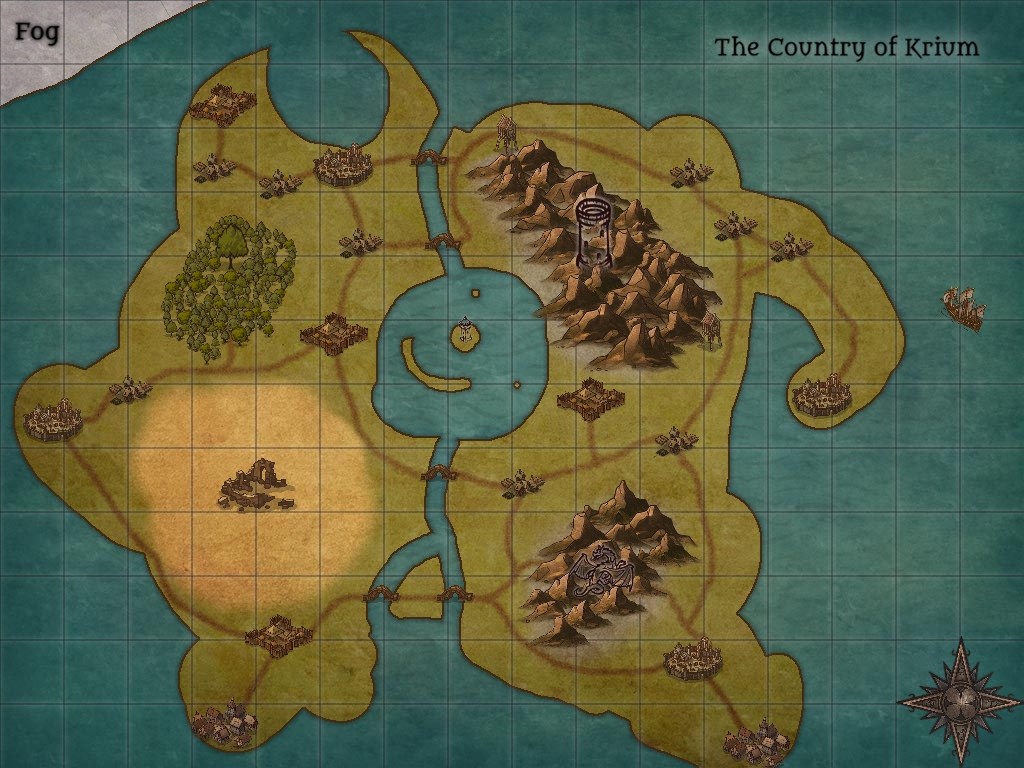
This tutorial is directed to D&D Players, Authors, and anyone else who has decided they wish to design a map of their own using Inkarnate. Authors may want to have a visual reference of their setting, while D&D dungeon masters may want to be able to pinpoint important locations to their players.
Challenges of Inkarnate
The main challenge that comes with starting to use Inkarnate is making maps that look realistic. Almost everyone has seen an old-style map in some way, whether through movies or video games. Trying to recreate the style, while also making your continents and landmasses look realistic can be a struggle for new users of the program.
Solution
I wanted to format the video to be a set of useful tips, rather than a step-by-step guide on how to make a specific map. Because of this, a lot of the wording in the video, except for when placing trees and mountains, is very open, and up to the watcher to decide various aspects.
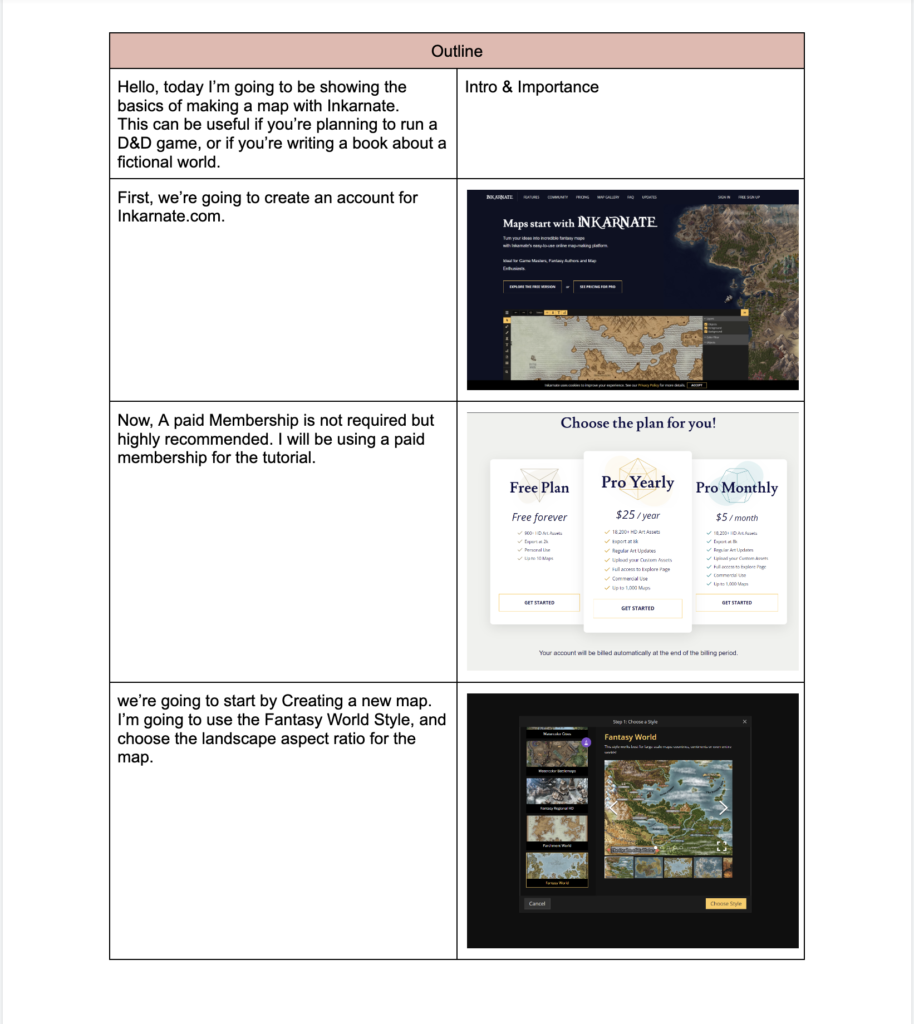
I approached the tutorial by first making an outline, filled with screenshots. This way, I was able to chunk the script out into sections, while knowing what to film for each part.
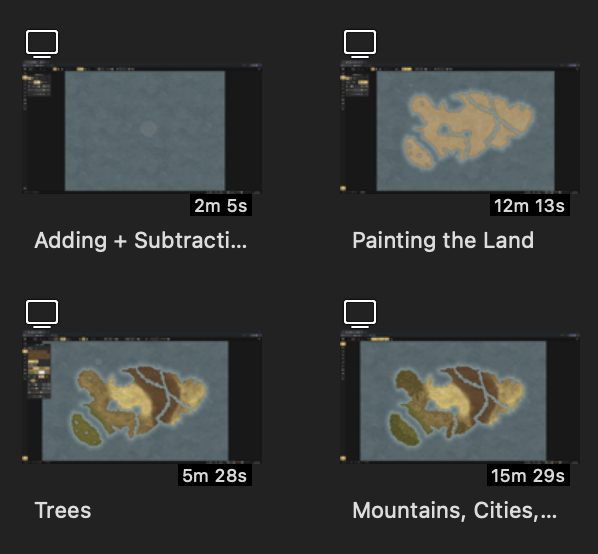
Once I finished the outline, it was time to record each part. The simple parts were recording scenes like where to make a new account, and showing off member pricing. The bulk of the recording comes from making the map itself. Recording only my screen, I built a map in the program, dividing each part into individual clips, like forming the landmass and painting the biomes. I ended up with around 30 minutes of footage without any cuts.
The next part was to record the script and edit it into the video so that the visuals and audio lined up. This involved a lot of visual cuts and fades. For longer periods of footage that didn’t require any lines, speeding them up into time-lapses helped provide a visual reference without taking too much time out of the viewer’s day. After speeding up a majority of the recordings, I went from a 30-minute video to a 5-minute video.
After viewing the initial draft, I noticed that during some of the time-lapses, I would open a screen-wide menu in Inkarnate to access other assets or paint colors. At normal speed, this was fine but sped up, this would make the screen flash black. This was very distracting, so I went through every timelapse that I had in the tutorial, cut out every time I opened the menu, and stitched the clips together with a fade. After adding some custom-made background music, as well as a recorded intro and call to action, my tutorial was finished.

Fan of D&D?
I also have an animated infographic on D&D, as well as a 3D Magazine Cover!